Monday, May 31, 2010

Make It Monday

Today's card isn't too complicated. I haven't been feeling the greatest. I think I have a stomach bug. And me, being the dingbat that I am, impaled myself on my paper piercing tool. I swear it hit the bone. So if ya see blood stains on my card, that's why.

Scroll to the bottom of this post for a simple tutorial on how to make this card.

Supplies
Stamps: All Holidays, Elements of Style

Paper: Whisper White, Chocolate Chip

Ink: Chocolate Chip, Baja Breeze

Accessories: Gold Brads, Double Stitched Chocolate Chip Ribbon, Ticket Corner Punch, Square Lattice Embossing Folder, Big Shot, Scallop Cirlces Die, Brayer, Circle Scissors Plus, Piercing Tool, Snail Adhesive, Stampin' Dimensionals

Embossing Folder Brayer Card

Friday, May 28, 2010

Fabulous Friday

Ok, one more card with the Razzleberry Lemonade DSP. This time, I stopped by Patty Bennett's Blog (Thanks Patty, You Rock!!!) for her double embossing technique. I really liked how it turned out. Using the gold embossing powder gets it a little somethin' extra. Oh, and I figured out something else to do with the DSP, stamp on it. I stamped my butterfly on DSP and cut it out. I've officially used half of the pack of paper in a week. Woohooo, I never thought I'd say that.

Supplies
Stamps: Ever After, All A Flutter
Paper: Basic Black, Whisper White, Brushed Gold, Razzleberry Lemonade DSP
Ink: Basic Black, Pumpkin Pie, Versamark
Accessories: Basic Black Satin Ribbon, Fire Square Brads, Gold Embossing Powder, Vintage Brads, Piercing Tool, Snail Adhesive, Mini Glue Dots, Stampin' Dimensionals, Heat Tool, Brayer, Big Shot, Elegant Bouquet Embossing Folder

Thursday, May 27, 2010

Try It Thursday

This is the birthday invitations I made for my little boy's friend, Leah. She will be 2 in a few weeks. We went camping with Leah's family this past weekend. You should have seen to two of them. They were laying on the bed watching Franklin and Cole leans over and gives Leah a kiss and half the time they were together, they were holding hands. They are starting young. lol Ahhhh...soon enough they will think the other has cooties. The picture below shows the insert for the party info.
So, for Try It Thursday, let's give a pocket fold card a try. It is easy peasy to make. Just cut your cardstock to 4 1/4" x 11" and score at 1 1/2" and 5 1/2". Fold, tape and decorate. And look, I managed to use up 2 sheets of the Razzleberry Lemonade DSP and the card doesn't look too bad.

ETA: the winner of this weeks' card kit from Random.org is.........

I actually love that paper! So I guess I hope I win your give away.
The card is very nice, I think.
Krista Pomeroy
purplewine1953@yahoo.com

Krista Pomeroy said... May 25, 2010 10:42 AM
Thanks for taking the time to leave a comment. I will email you for your info.

Supplies
Stamps: Introducing, Flight of the Butterfly, Inspired By Nature
Paper: Pretty in Pink, Melon Mambo, Whisper White, Razzleberry Lemonade DSP
Ink: Basic Black, Pretty in Pink, Melon Mambo, Certainly Celery
Accessories: Pretty in Pink Grosgrain Ribbon, Melon Mambo Polka Dot Ribbon, Stamp-a-ma-jig, Butterfly Punch, Small OVal Punch, Large Oval Punch, Scallop Oval Punch, Corner Round Punch, Crop-a-Dile (for making holes for ribbon), Stampin' Sponges, Snail Adhesive, Tombow Adhesive, Stampin' Dimensionals

Wednesday, May 26, 2010

Wheel It Wednesday

Are these little owls just the cutest? This is #3 of the 4 Father's Day cards I need. This only will probably be from Cole cause I think it's little boy cute. (I know, I'm a dork)

To cover the chipboard I just traces the outline of my owl onto the wrong side of my DSP and cut it out. I then used the fat end of my Tombow Adhesive to apply a thin coat to the chip and adhered the DSP. Then, I used my sanding block to sand off the excess DSP and sponged the edges with Chocolate Chip ink to give it that finished look. There are other ways to apply DSP to Chipboard but this is how get the best result.

Supplies
Stamps: Teeny Tiny Wishes, Classic Stars Wheel
Paper: Night of Navy, Sahara Sand, Whisper White, Basic Black, Travel Journal DSP, Tall Tales DSP, To The Nines DSP
Ink: Chocolate Chip, So Safron Craft Ink, Signo Gel Pen
Accessories: On Board So Tweet Chipboard, Chocolate Chip Satin Ribbon, Silver Brads, Word Window Punch, Modern Label Punch, Scallop Circle Punch, 3/4" Circle Punch, 1/2" Circle Punch, Mat Pack, Piercing Tool, Snail Adhesive, Tombow Adhesive, Stampin' Dimensionals, Sanding Block, Stampin' Sponges

Tuesday, May 25, 2010

Take It Tuesday

So here is a card using the DSP I hate so much, Razzleberry Lemonade. I've come to the realization that not only do I hate it, but it sucks that creative life out of me. This is the 4th attempt at making a card with this paper and I can't stand this card either but it is better than my first 3 attempts (don't even ask). The number 1 suggestion I had to use up this paper was to give it as prizes/gifts. So here we go. It is part of my tuesday give away. I hope some of my fellow papercrafters like this paper enough to leave me a comment. On the plus side, I used up 2 full sheets coming up with this card. 2 sheets down, 10 to go. LOL

This card is part of Take It Tuesday. If you leave a comment on this blog post (click here to go to my blog if you are reading this from Facebook), you will be entered to win a free card kit with enough supplies to make 5 copies of this card (minus the adhesive and stamped images). You have until midnight May 26/10. I will pick a winner on Thursday.

Supplies
Stamps: Awash In Flowers, Tiny Tiny Wishes
Paper: Melon Mambo, Rich Razzleberry, Whisper White, Razzleberry Lemonade DSP
Ink: Basic Black, Rich Razzleberry, Certainly Celery
Accessories: Melon Mambo Polka Dot Ribbon, Small Oval Punch, Large Oval Punch, Scallop Oval Punch, Scallop Corner Punch, Scallop Trim Punch, Scallop Border Punch, Snail Adhesive, Stampin' Dimensionals

Monday, May 24, 2010

Make It Monday - Tea Light Card


I hope everyone had a great weekend. We went camping this weekend and while it didn't snow, like last year, it was raining and windy and cold. Ahhhh..... the joys of the May Long weekend. I vote to change the May Long Weekend to the last weekend in May cause the weather is always nice then. Who is with me? But all in all we had lots of fun.

Today's card / tea light is something I saw while Blog Hopping. The original, while absolutely beautiful, was in metric, not in English, and held 4 tea lights. So little ole me, sat down with my 3 tea lights and a ruler and figured out the measurements to make a 3 tea light card. And yes, it's metric and in English (hee hee) Although I might had been able to put together something in not so understandable French (it's been a while since I used it) lol. The original came from Anneth @ ScrapGalen.

Scroll to the bottom of this post where I posted a tutorial on how to make this project. This is my first attempt at making a tutorial this complicated so let me know if there is any problems with it.

Supplies
Stamps: Bouquet Bunch, Teeny Tiny Wishes
Paper: Whisper White, Pale Plum, Rich Razzleberry, Medium Window Sheets, Cottage Wall DSP
Ink: Basic Black, Pale Plum marker, Rich Razzleberry marker, Old Olive marker
Accessories: Rich Razzleberry Polka Dot Ribbon, Latte Designer Buttons, Playground Designer Buttons, Big Shot, Beautiful Wings Embosslit, 1 1/4" Circle Punch, Word Window Punch, Modern Label Punch, Ticket Corner Punch, Snail Adhesive, Mini Glue Dots, Tombow Adhesive, Stampin' Dimensionals, Sticky Strip, Dotto Repositionable Adhesive, 3 Tea Light (mine are Partylite)

Friday, May 21, 2010

Fabulous Friday

I made this card earlier this week but it's been killing me to wait until today to share it. I love, Love, LOVE how it turned out. There isn't a whole lot to this card but I think it has such a dramatic effect with the black and white.

Supplies
Stamps: Friends 24-7
Paper: Whisper White, Basic Black
Ink: Whisper White, Basic Black
Accessories: Pretties Kit, Basic Black Satin Ribbon, Whisper White Satin Ribbon, Circle Designer Brads, White Embossing Powder, Embossing Buddy, Powder Pal, Mini Glue Dots, Snail Adhesive

Thursday, May 20, 2010

Try It Thursday

ETA: The winner of yesterday's card Kit from Random.org is.....drumroll.....

Very pretty, love the whisper white paper, is it textured using the big shot?


Please email me at stampinwithmichelle@shaw.ca with your contact info so I can send you your card kit.
For Try It Thursday, I thought I'd do a Gatefold card. They create such a pretty card and I definitely don't make them enough. And did you notice? I used Christmas DSP this time. I know, crazy girl. The snow has bearly melted, the sun is splitting the rocks and she is using Christmas paper. LMBO

Anyhoo, today I made a sympathy card but it isn't anyone in particular. I don't like making sympathy cards, especially when I know what it is for, so I try to always have a few on hand. It's easier to pick a card then to sit and make a card with a heavy heart.

I'll be back later to post who won this week's card kit.

Supplies
Stamps: Thoughts & Prayers, Itty Bitty Bits
Paper: Old Olive, Basic Black, Whisper White, Merry Moments DSP
Ink: Old Olive, Regal Rose
Accessories: Earth Elements Brads, Itty Bitty Shapes Punch, Ticket Corner Punch, Piercing Tool,
Snail Adhesive, Tombow Adhesive

Wednesday, May 19, 2010

Wheel It Wednesday


When I first saw the sheet of Travel Journal DSP with the map on it, all that came to mind was this wheel and the Loads of Love Stamp Set. I haven't had time to play with the stamp set but this was my first attempt at using the wheel with this paper. I can't say that I am entirely happy with it so I might still play around with it. I knew I wouldn't be able to stay away from this paper for long. Now if I start using this DSP with the Elements of Style Stamp Set I think the world is in trouble LOL


Supplies

Stamps: King of the Grill, Tailgating Wheel
Paper: Night og Navy, Pumpkin Pie, Kraft, Travel Journal DSP
Ink: Basic Black, Sahara Sand
Accessories: Hemp Twine, Antique Brass Metallic Eyelets, Crop-a-Dile, Stampin' Around Handle, My Way Punch, Stampin' Sponges, Snail Adhesive, Stampin' Dimensionals

Tuesday, May 18, 2010

Take It Tuesday


This weekend I was asked by my church to present at a Woman's Retreat. I made a simple card cause most of the ladies there were brand new to stamping. I love teaching people how to stamp and seeing all the creativity that comes from that. The above card (inside and out)is the one I made after the retreat using some of the wonderful ideas I got from the ladies.
The card below was my original card.

This card is part of Take It Tuesday. If you leave a comment on this blog post (click here to go to my blog if you are reading this from Facebook), you will be entered to win a free card kit with enough supplies to make 5 copies of this card (minus the adhesive and stamped images). You have until midnight May 19/10. I will pick a winner on Thursday because I am late posting today.

Supplies Stamps: Friends 24-7 Paper: Whisper White, Basic Black, Pretty in Pink Ink: Basic Black, Pretty in Pink ink pad and marker, Certainly Celery marker Accessories: Basic Black Satin Ribbon, Big Shot, Square Lattice Embossing Folder, Snail Adhesive, Stampin' Dimensionals

CLICK HERE TO ORDER PRODUCTS 24/7

Monday, May 17, 2010

Make It Monday

I really need help to not use this stamp set. I sat down to make this card and when I opened up the case to take out the stamps, it was empty. I hadn't taken them off the block since the last time I used them. I've been waiting a long time for an image like this and now that I have it I guess I'ma gonna use it.
My favorite color rose is white. I wasn't sure how well coloring with my white gel pen was going to work cause it covers all the image but I made sure to let some of the Basic Brown ink show through and ended up with the effect I was looking for.

Scroll to the bottom of this post for a step by step tutorial on how to make this card.

Supplies
Stamps: Elements of Style
Paper: Kraft, Basic Black, Always Artichoke, To The Nines DSP
Ink: Basic Brown, Always Artichoke Marker, So Saffron Marker, White Signo Gel Pen
Accessories: Kraft Taffeta Ribbon, Vintage Brads, XL Two-Step Bird Punch, 1" Circle Punch, 1 1/4" Circle Punch, Corner Round Punch, Stampin' Sponges, Piercing Tool, Snail Adhesive, Stampin' Dimensionals, TomBow Adhesive


White Roses Card

Friday, May 14, 2010

Fabulous Friday

It's Fabulous Friday!!!

Today's card is supposed to look like a foggy day. I'm not sure if I succeeded with that effect but I thought the card looked pretty in the end. It was easy peasy to make this card. I just stamped some background trees in Perfect Plum ink (the camera didn't pick that up very well) and my main tree image in Elegant Eggplant ink. When it dried I used my sponge dauber and covered the cardstock in Whisper White ink.

I hope everyone has a super weekend.

Supplies
Stamps: Lovely as a Tree, Le Jardin Botanique, All Holidays
Paper: Elegant Eggplant, Whisper White
Ink: Perfect Plum, Elegant Eggplant, Whisper White
Accessories: Whisper White Satin Ribbon, Slot Punch, Small Oval Punch, Larger Oval Punch, Scallop Oval Punch, Sponge Dauber, Snail Adhesive, Stampin' Dimensionals

Thursday, May 13, 2010

Try It Thursday

Okay, I just couldn't stay away from the Elements of Style stamp set. A few years back I went to ScrapFest and one of the layouts had a picture on it that had clear microbeads glued to a picture. I remember thinking that I had to try it. Well, 2 and a half years later, here you go. I don't know if this technique has a name. If it does, please leave a comment as I would love to know. To do this technique, I stamped and colored my image and sponged the edges with Creamy Caramel ink. I then put a generous coat of Crystal Effects over the entire images, spreading it with an old paintbrush, and put it in a Powder Pal. I poured the microbeads over top and patted with my fingers to make sure the beads stuck well. To put the Rhinestone Brad on the ribbon I separated the prings and wrapped in around the bow.
I like how this image turned out but let me tell ya, what a mess. I thought Dazzling Diamonds was messing. I have these silly little beads from one end of my craft room to the other.

Supplies
Stamps: Elements of Style, En Francais
Paper: Basic Black, Whisper White
Ink: Basic Black, Creamy Caramel, Dusty Durango marker, Always Artichoke marker
Accessories: Clear Mircobeads, Fire Square Rhinestone Brads, Scallop Trim Border Punch, Sponge Dauber, Crystal Effects, Stampin' Dimensionals, Snail Adhesive, Mini Glue Dots

Wednesday, May 12, 2010

Wheel It Wednesday

I normally don't post cards with images that are not Stampin' Up! on my blog but this stamp I bought this weekend when I rode on Thomas the Train. Everything else on the card is Stampin' Up!, though. I'm probably going to use this set to make Cole's birthday invitations.
Let me tell ya, I have a new appreciation for the quality of SU rubber. This stamp wasn't die cut, you know where the rubber is the same same as the wooden block. No matter how I tried to ink it up, I always got ink on the corners. So, me being me, I peeled the stamp off the wood, cut around the image and stuck it back on with Crystal Effects. I still didn't get a crisp image and had to fill in some areas with my Basic Black marker. But all in all, my little boy loves it and Toots, Toots! when he sees it. :)

ETA: The winner of yesterday's card Kit from Random.org is.....drumroll.....

Anonymous kathy brown said...

I LOVE this card! It is TOO cute!!! TFS!!

kathy

Kathy, I will email you for your contact info so I can send you your card kit.

Supplies Stamps: Thomas the Train (not SU), All Holidays, Right on Track Wheel Paper: Night of Navy, Pumpkin Pie, Whisper White, Kraft, Travel Joournal DSP Ink: Basic Black, Brilliant BLue marker, Real Red marker, Yoyo Yellow, Marker, Going Gray marker, Basic Gray marker Accessories: Silver Brads, Square Lattice Impressions folder, Big Shot, 1/4" Circle Punch, 1/2" Circle Punch, Ticket Corner Punch, TomBow Adhesive, Snail Adhesive, Stampin' Dimensionals

CLICK HERE TO ORDER PRODUCTS 24/7

Tuesday, May 11, 2010

Take It Tuesday

I really love the NEW Travel Journal DSP from the Stampin' Up! Summer Mini Catalogue. I've had it for over a month now and I've purposely not opened the package cause I knew I would want to use this paper every time I made something. Well, I broke the seal and can't be held responsible for the amount of times I use it. I just love the Pumpkin Pie and Night of Navy combo. Oh, and the fact that Kraft cardstock (my new go-to color) coordinates with it, will not make it any easier to stay away from.

This card is part of Take It Tuesday. If you leave a comment on this blog post (click here to go to my blog if you are reading this from Facebook), you will be entered to win a free card kit with enough supplies to make 5 copies of this card (minus the adhesive and stamped images). You have until midnight May 11/10. I will pick a winner on Wednesday.


Supplies

Stamps: Hoppy for You
Paper: Night of Navy, Kraft, Whisper White, Garden Green, Travel Journal DSP
Ink: Basic Black, Garden Green ink pad and marker, Close to Cocoa marker, Bashful Blue marker
Accessories: Square Lattice Folder, Big Shot, 1" Circle Punch, 1 1/4" Circle Punch, 1 3/8" Circle Punch, Small Oval Punch, Large Oval Punch, Ticket Corner Punch, Snail Adhesive, Stampin' Dimensionals, Silver Brads, Piercing tool

CLICK HERE TO ORDER PRODUCTS 24/7

Monday, May 10, 2010

Make It Monday

Sorry I'm a little late posting my tutorial today. I had a really busy weekend and I was just too tired to write up the blog post last night. So how was your Mother's Day? I got to ride on Thomas the Train for Mother's Day. How cool is that? My little boy loved it. He was so cute, tooting like Thomas for just about the whole ride. We also went to the zoo and the waterpark. I was just pooped by the time we got home. But we all had a blast.

I was looking through my DSP the other day wondering which one I wanted to use to make a card and I stopped at my Halloween paper and I thought "Hmmmm.........What am I going to do with this?" I know next year I will buy all new stuff and this will just sit in the package. But when I took a closer look at it I noticed that one side of the paper was not so Halloweeny and I could use it for any occasion (except for 1 sheet). So I decided why not use it up. That's when I looked at this particular patterned and thought it would make a really nice background to stamp on.

Scroll to the bottom of this post for a tutorial on this card.

Supplies
Stamps: Asian Artistry(hostess), Embrace Life
Paper: Basic Black, Whisper White, Cast-A-Spell DSP
Ink: Basic Black
Accessories: Old Olive Satin Ribbon, Pretties Kit, Filigree Brads, Big Shot, Butterfly Wings Embosslit, Stampin' Dimensionals, Mini Glue Dots, Snail Adhesive, TomBow Adhesive, Piercing Tool, Eyelet Border Punch, Word Window Punch, Modern Label Punch


Stamping on DSP Card

Friday, May 7, 2010

Fabulous Friday


It's Fabulous Friday. I'm not sure who I'm going to give this card to but I never seem to have enough masculine cards. I know it has a bow on it but Hey, I'm a girl. What can I say?
My Tip today is about coloring images with Stampin' Up! markers. I use Shimmery White paper. It doesn't seem to pile as much as Whisper White and you can add a few layers of ink to make some areas darker than others. I colored the lighter, shadowy areas with a little ink and a blender pen.

Supplies
Stamps: King of the Grill
Paper: Always Artichoke, Chocolate Chip, Shimmery White, To the Nines DSP
Ink: Stazon Black, Sage Shadow marker, Chocolate Chip marker, Sahara Sand marker, Going Gray marker, Basic Gray marker, Blush Blossom marker, Bashful Blue marker, Real Red marker, Brocade Blue marker, Platinum Shimmer Paint
Accessories: Chocolate Chip Satin Ribbon, Pinking Hearts Border Punch, Word Window Punch, Modern Label Punch, 1" Circle Punch, Designer Label Punch, Stylus, Blender Pen, Stampin' Dimensionals, Snail Adhesive

Thursday, May 6, 2010

Try It Thursday

This card has to be one my favorite that I have ever made. I just love it. When I started to make this card I had in mind to put some pearls and rhinestone brads and maybe a bow on it but as I was putting it together, I got to this point and decided to stop. I just loved the way it looked and didn't think it needed anything else.
By now you have to be thinking to yourself "Girl, step away from the Elements of Style set". I can't help it. It is such an awesome set. This is the first time I used it without making a vintage style card. And yes, that's the Presto Designer paper on the card. I swear a tear fell from my eye as I cut the 12 x 12 sheet to the size I needed. It broke my heart to cut it. The picture in the mini catalogue doesn't do this paper justice. It is by fair the nicest paper I've worked with and the option to make it any color, saa-weeet.
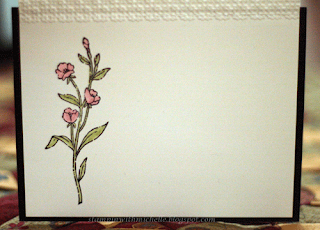
So for Try It Thursday the technique is stamping on vellum. For this card I stamped my flowers on one side with Stazon black ink and flipped it over and colored with my Stampin' markers on the back side. It gives a beautiful effect and I think it is called Stained Glass Technique but correct me if I'm wrong. I then stamped my En Francais background on Whisper White with Sahara Sand ink and sponged the edges with Sahara Sand. I attached the vellum over top with a spray adhesive. The butterfly was stamped on vellum, colored on back and cut out. The Presto DSP was colored using a brayer and Sahara Sand ink. (BTW, this is a 5 1/4" x 5 1/4" card)

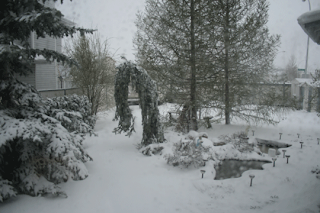
If you scroll to the bottom I've attached a picture of all the snow I saw as I came down the stairs on Tuesday morning.

Supplies
Stamps: Elements of Style, All a Flutter, Oval All, En Francais BG

Paper: Whisper White, Basic Black, Sahara Sand, Vellum Cardstock, Presto Patterns DSP
Ink: Sahara Sand, Stazon Black, Rose Red Marker, Always Artichoke Marker, Basic Gray Marker

Accessories: Black Satin Ribbon, Large Oval Punch, Scallop Oval Punch, Brayer, Sponge Dauber, Snail Adhesive, Stampin' Dimensionals, Tombow Adhesive, Spray Adhesive


Wednesday, May 5, 2010

Wheel It Wednesday


ETA: The winner of yesterday's card Kit from Random.org is.....drumroll.....

So soft, gentle and sweet! Where do you live that you're getting snow on May 4th??? I've heard of it in April, but never May - and we're having 80 - 90 degrees here in SC. Crazy weather, but both are conducive to staying inside and stamping - I might have to case this sweet card! Thanks for sharing. Jean

May 4, 2010 8:32 AM


Please email me at stampinwithmichelle@shaw.ca with your contact info so I can send you your card kit.

I can never think of anything to get my nephew for his birthday. He lives on the other side of the country and if I buy something big (in size) then it costs a fortune to mail. So I usually send a gift card and he can go and buy what he wants. So I've been trying to think of a neat way to package a gift card. Yesterday I was going through some boxes in my craft room and I found a project from one of my team meetings. It was a notepad that was done up like a matchbook. When I saw it I thought " Well, that would make an awesome card / gift card holder."

Here is the inside.


I only ordered the new builder wheels last week. When I did my demo pre-order at the beginning of the month I hummed and hawed and didn't see myself using 3 wheels together very much so I didn't order them. I never in though of how often I could use the smaller wheels by themselves on my projects, like I did on this card. But now that I have the builder wheel set, I'll play with it and I'm sure I'll like the builder aspect.

I'll have to put in a different gift card cause my nephew is 10 and I think he'd like a Toys R Us or iTunes one better (Hee hee, this was the only one I could find when I was taking the picture. Well it was either that or my driver's license lol).

Supplies
Stamps: Bugs & Kisses, So Many Stars Wheel
Paper: Whisper White, Ballet Blue, Pumpkin Pie
Ink: Basic Black, Ballet Blue, Garden Green, Creamy Caramel, Pumpkin Pie
Accessories: Pumpkin Pie Striped Grosgrain Ribbon, Clips Assortment, Slit Punch, 1" Circle Punch, 1 1/4" Circle Punch, 1 3/8" Circle Punch, Snail Adhesive, Stampin' Dimensionals, Staples

Tuesday, May 4, 2010

Take It Tuesday

Don't look too closely at this card. At the last minute I decided to flip it and put the ribbon on the hotdog way. Of course that was after I stamped all my images and taped on my ribbon. Something just wasn't clicking when it was vertical. But I like it this way. I think I will make it again with all the stamped images going the right way.

The little silver dots on the embossed white layer was done by dipping my stylus into my platinum shimmer paint and then dabbing it on the cardstock. That gives you a nice little dot. Of coarse the more paint you put on your stylus, the bigger your dot will be.

This card is part of Take It Tuesday. If you leave a comment on this blog post (click here to go to my blog if you are reading this from Facebook), you will be entered to win a free card kit with enough supplies to make 5 copies of this card (minus the adhesive and stamped images). You have until midnight May 4/10. I will pick a winner on Wednesday.

Supplies
Stamps: Itty Bitty Bits, Teeny Tiny Wishes (just realized the small names lol I'm such a dork)
Paper: Pink Pirouette, Whisper White, Brushed Silver
Ink: Pink Pirouette, Basic Black, Platinum Shimmer Paint
Accessories: Pretty in Pink striped grosgrain, Slot Punch, Big Shot, Perfect Details Texturz Plate, Lots of Tags sizzlit, Large Oval Punch, Small Oval Punch, Scallop Border Punch, Stylus, Piercing Tool, Mat Pack, Snail Adhesive

Monday, May 3, 2010

Make It Monday

I seem to be on clean and simple kick with my cards lately. I always tend to make pretty complicated cards with lots of layering and inking. So I think this is nice for a change. Plus, I have lots and lots of DSP scraps and what do you do with all those little pieces, other than just look in the box and admire them. That's where these cute little punches come in handy. Anyway, I hope the rooster in my little boy doesn't wake up too early. I can use a little extra R & R but who couldn't. lol

Remember to keep scrollin' and there is a tutorial at the bottom of this post.

Supplies
Stamps: Teeny Tiny Wishes
Paper: Naturals Ivory, Chocolate Chip, Various scraps of DSP
Ink: Chocolate Chip
Accessories: Chocolate Chip 1" Double Stitched Grosgrain Ribbon, Kraft Corduroy Buttons, Linen Thread, Small Heart Punch, Modern Label Punch, 1" Cirlce Punch, Designer Label Punch, Mat Pack Piercing Tool, Stampin' Sponges, Stampin' Dimensionals, Snail Adhesive

Make It Monday

Newer Posts Older Posts Home